How to Build an Easy Website
![]() There once was a time when you needed to know programming to build a website. However I am going to show you how to build an easy website using WordPress that will surprise you in its simplicity. If you are familiar with writing document files in a word program like Microsoft Word or Google Docs, then creating content for your WordPress website will be quite easy. So let’s get started.
There once was a time when you needed to know programming to build a website. However I am going to show you how to build an easy website using WordPress that will surprise you in its simplicity. If you are familiar with writing document files in a word program like Microsoft Word or Google Docs, then creating content for your WordPress website will be quite easy. So let’s get started.
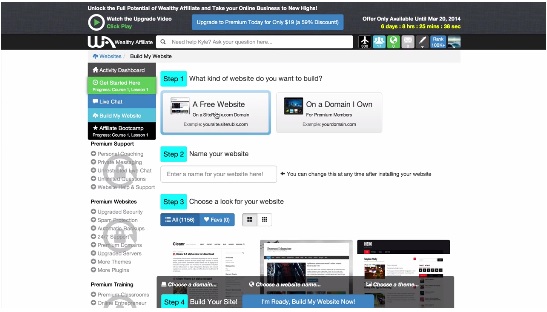
In order to take advantage of the easiest website builder on the internet you will need to sign up for a 100% free Starter Member account at Wealthy Affiliate University as it is their exclusive website builder, training in basic keyword research and SEO, creation resources and hosting that you will be using all for free. You will not need your debit or credit card to join, just your name and a valid email address.
If you wish to join you can do so at any time from within my Wealthy Affiliate Review page or within the below video. This video will show you how quick (under 30 seconds) your website will be created for you. Click the below image to bring up the video lesson. After watching the video, please continue reading below , starting with my next section entitled, How to build a website with WordPress.
How to build a website with WordPress
First off WordPress is a widely used website CMS (Content Management System) and it is favored by Google because it makes it very easy for their spider-bots to crawl the website. The easier a website is to be crawled by the Google spider-bots, the better Google can index your content and in turn rank your content. Getting the highest Google rankings is what many who create websites want so they can gain traffic and then customers.
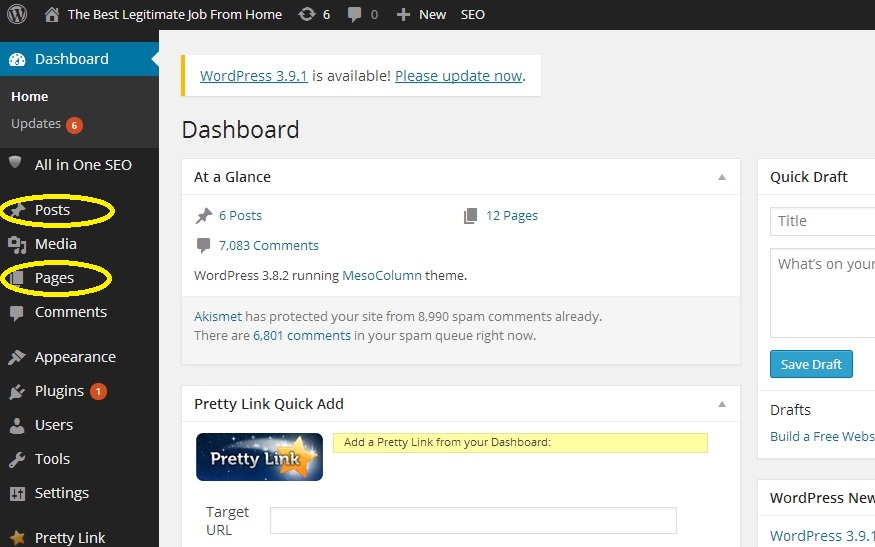
Once you have accessed your WordPress Dashboard area as seen in the picture above, you will notice the various menu items within the left side menu. Though there are several items within the menu, I am only going to focus on two of them as they are the main points of interest in creating your content of the niche you have selected for your website.
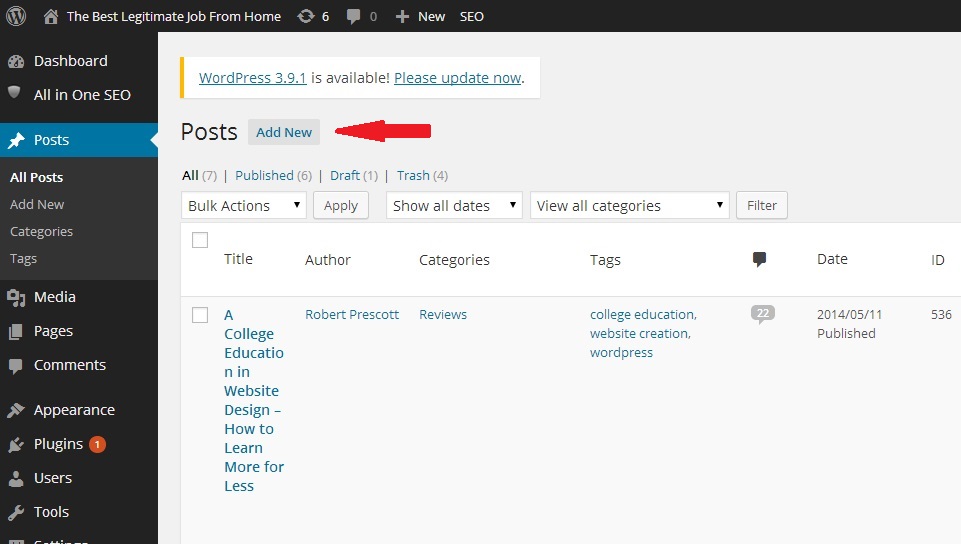
If you click on the word “Posts” within the left menu of your dashboard it will open a screen that will display any of the Posts that you have created. You can see a picture of my Posts page above. When you want to create a new Post you would simply click on the “Add New” button. NOTE: A Post is the same thing as a Blog, hence the name Blog Post. By default in WordPress, your Posts are displayed on your Home page Blog Roll.
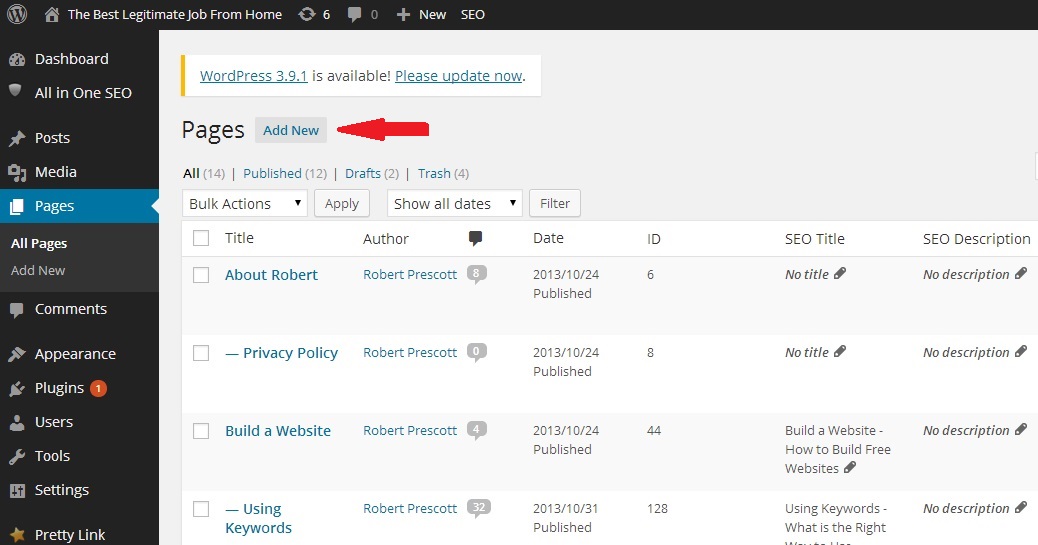
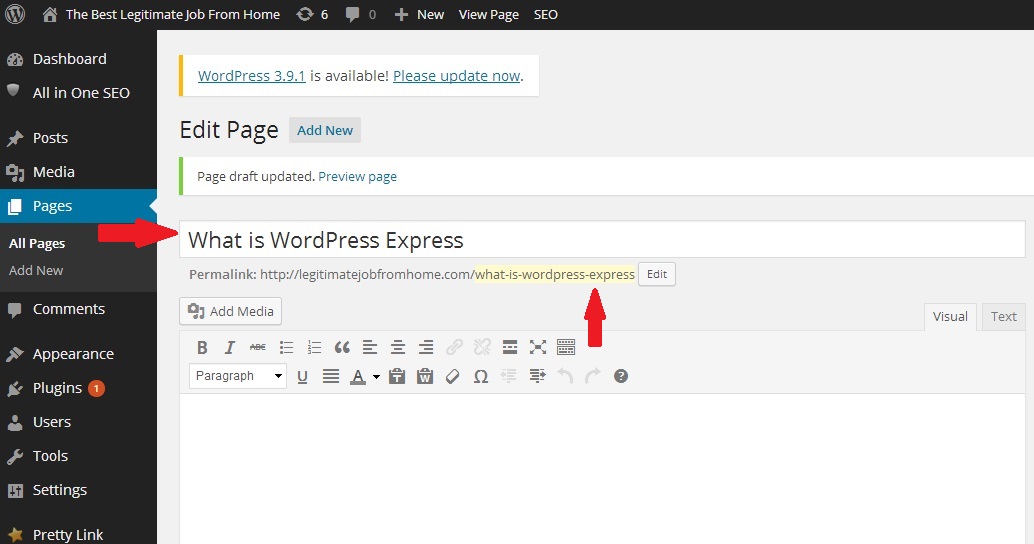
The same functionality is true for when you wish to create a new Page when clicking the word “Pages” within the left menu of your dashboard. This can be seen in the picture of my Pages page below. NOTE: A Page is the content that by default appears within your website menu, which most times appears along the top of the website screen.
Inside the WordPress Editor
After clicking on the “Add New” button for either a Post or a Page, you will be taken to the WordPress Edit Page. This is the page where you will be creating all of your text, images and video content. The first thing you will want to do is type the name (title) of your Post or Page into the Title bar. This is shown in the picture below where it says, What is WordPress Express. Just below is where the URL web address will be displayed.
In the blank area just below the title bar, URL, and text icons is where you would type your content and add your media (images & videos). I personally write all of my content in a word document program and not directly into the WordPress editor. I do this so that I can write with both spelling and grammar checkers active while I type. It also gives me an extra way to save my content for emergency purposes should something go wrong with WordPress and my content is lost.
NOTE: If you should do the same and type up your content in a word document program, you will want to copy and paste that content within the “Text” tab of the editor window and not the “Visual” tab which you are currently within. You can see the Visual and Text tabs on the extreme right of the picture. By default you are always working within the Visual tab area of the editor. More on that in the Action Buttons section below.
WordPress Editor Icons
Writing your content within WordPress is very similar to writing within a document program. It utilizes many of the same typing and font functionality which are displayed by way of icons along the top of the editor window. When you first open the editor there will be one row of text editor icons along the top under the Add Media button, as seen in the below picture. The Add Media button is for exactly what it says, mainly to add images to the editor. The text editor icons from left to right are: Bold, Italic, Strikethrough, Bullet Point, Numbered Listing, Back Quote, Align Left, Align Center, Align Right, Insert/Edit Link, Unlink, Insert More Tag, Distraction Free Writing, and Show/Hide Kitchen Sink.
![]()
Those icons will help you in the writing of your content by giving you ways to manipulate how your text will look. However there are more important text editor icons that are not visible, yet are very important for the creation of your website content. As you can see in the above picture I have the Show/Hide Kitchen Sink icon circled.
When you click the Kitchen Sink icon it will display another row of text editor icons as seen in the picture below. From left to right these are: Paragraph (Text Type), Underline, Align Full, Select Text Color, Paste as Plain Text, Paste from Word, Remove Formatting, Insert Custom Character, Outdent, Indent, Undo, Redo, and Help. NOTE: You want to click the down arrow next to “Paragraph” so that it will display other options, such as the Heading Tags you may want to use. For normal writing of content you should leave it on “Paragraph”.
![]()
Action Buttons on the right side
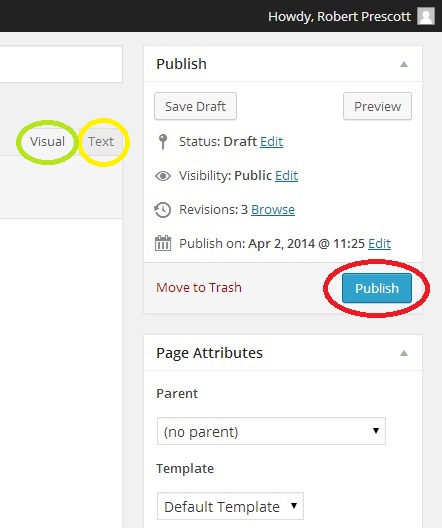
Earlier above I mentioned the Visual and Text tabs of the WordPress Editor. These two tabs along with three other action buttons are what I will discuss here. You can see them in the picture to the right. Like I said above, if you are using a document program like Microsoft Word or Google Docs to write up your content, you will want to copy and paste that content into the “Text” tab area of the editor. This will help to strip out the added hidden code that those document programs embed into the text. Once pasted into the Text tab, you can then switch back to the “Visual” tab.
To the right of the Visual and Text tabs you will also see the Save Draft and Preview buttons. These buttons do basically what they say. When you are in the creation phase of your content, prior to actually publishing it on the internet, you will want to save your work by clicking the Save Draft button. Then if you wish to see what it will look like on your website you would click the Preview button. When you are ready to make your content live on the internet you click the Publish button. After you click the Publish button for the first time it will then say Update. So now every time you want to publish any changes made as you build your website, you will click the Update button.
Recap
That is basically it as far as the two main areas of the WordPress editor that are the most important aspects for getting your content created. I recommend that you experiment with many of the various menu functionality buttons to see what they do. You can also click on the ‘?’ Help icon for more information. Make sure to Save Draft any content that you made changes prior to experimenting with any of the editor functionality.
If you should decide to join Wealthy Affiliate University for the best online training in up to date WordPress website design, I highly suggest that you join as a Free Starter Member first. Don’t feel pressured to pay for the Premium Membership right away. Join as a free member, enjoy and learn for free how to build your websites. Then if you feel you want more knowledge and more resources, feel free to upgrade.
It is my feeling that if something is free, you might as well take advantage of it. Just like you would test drive a car before you buy it, you should test drive the features and training of Wealthy Affiliate before paying for any upgrades. If you have any comments or questions please leave them below and I will get back to you shortly.
It’s nice easy tutorial how to use wordpress and set own personal website. I’m reading your content and learning about wordpress. thanks.
Thank you Manoj. I am happy you are learning about WordPress. It really is the best way to build a website and Google loves WordPress websites, which means they will rank better and are simple enough to be used on mobile devices, which is also very important now in 2015 and going forward.
Well done, Robert. It is nice to see someone who cares about correct spelling and correct grammar. Your explanations are so easy to follow. How about doing a piece that tells people how to set up their auto responder? There is so much to learn about website building, e.g., how do you make cartoon characters on the “Buy Now” portion of your sales page?
Well Chuck, when I have a firm grasp on how to do that I will write about it. But right now I am still in the learning process. Cartoon Characters? Not sure what you mean by that. Are you referring to a graphic image of some kind?